A leaking tap may look like a small issue, but do you know that single drop per second can waste more than 3,000 gallons (13,600 liters) of water each year? That not only wastes waters but increases your water bill.
Updated by Fixlp on January 14, 2026
The good thing, however, is that it’s an easy DIY project that most homeowners can do themselves without hiring an electrician. In this guide, we will explain:
- Why taps leak
- The tools you will require
- Step-by-step instructions for the different types of tap
- Passes-by-to-avoid common pitfalls
- Preventive tips for avoiding recurrence
- When to call a plumber
What Are the Reasons for a Leaking Tap? (Major Causes)
Taps have many reasons for leak. The reason for such is a significant one for selecting the correct one to fix it.
- Old Washer – common reason for making compression taps leak.
- Damaged O-rings – small rubber seals that wear out.
- Faulty cartridge – these items are failing more in modern mixing taps.
- Loose or corroded valve seat – may cause a leaking faucet around the spout.
- High pressure – forces water even through an off tap.
- Poor installation or cheap parts – most frequently symbolizes cause of recurrent leaks.
Pro advice: If you have a new tap leaking out of the box, check it carefully; it may still be under warranty before attempting major repairs.
Tools You Need to Fix a Leaking Tap
Before you launch into action, gather these essential tools well:
- Adjustable wrench (spanner)
- Screwdrivers (Flathead and Phillips)
- Washer replacement cartridges or O-rings
- Tape (or Teflon tape)
- Pliers
- Cloth or rag (to protect the tap finish)
- Bucket or towel (to catch drips)
Step-by-Step: How to Fix a Leaking Tap
1. Switch off the Water Supply
Find the isolation valve under your sink and turn clockwise to shut off the water. If you cannot find it, turn off the main water supply.
2. Plug the Drain
Put a sink plug in or cover it with cloth to prevent the tiny parts from coming out.
3. Remove the Tap Handle
- Pop the decorative cap off (if there is one).
- Use a screwdriver to take out the screw that holds the handle.
- Gently pull the handle off and exposed the mechanism.
4. Inspect and Replace the Washer
In case of compression taps:
- Unscrew the stem with a wrench.
- Take out the old washer.
- Replace it with a new washer of the same size.
5. The O-Ring Must Be Inspected
If water is leaking:
- Remove the old O-ring.
- Put a new one back in place.
- Add a bit of plumber’s grease up fit well.
6. Fixing A Mixer or Cartridge Tap
For modern mixer taps:
- Remove the retaining nut/clip.
- Remove the cartridge.
- Place a fresh compatible new cartridge.
7. Put It All Together and Check
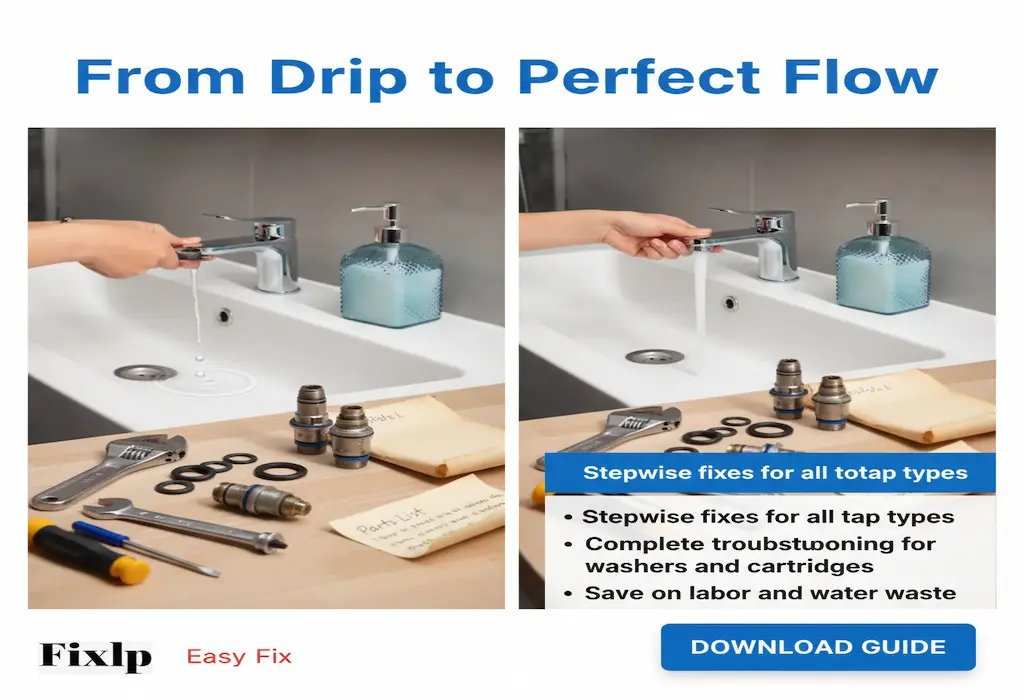
Reassemble the parts of the tap, turn on the water supply again and run the test for leaks.
Avoided Common Mistakes
- Using wrong-sized washers or cartridges
- Not turning the water off
- Too tight screws (may crack parts)
- Leaving leaks around the base of the tap ignored (which could signify bigger things wrong)
Preventing Future Tap Leaks
While usually with less hassle and cost, here’s how to do it:
- Don’t overtighten taps.
- Clean the aerators to avoid blockage by minerals.
- Service your taps every few years.
Quality taps, quality parts.
Costs of Fixing a Tap Leak
- DIY washer= $2-$10
- New cartridge=$10-$40
- Plumber service call=$70-$150
If you are comfortable using the tools, DIY is a lot less expensive. But for complex mixer taps, calling a professional may be worth it.
Eco-Benefits of Fixing a Leak Tap
You save money just not only by fixing your tap; you also save the planet. Annually, millions upon millions of kinds of liters are wasted through household leaks. By having a leak repaired, you’re doing your bit for conserving water.
Safety Tips Before You Start
- Always turn off the water supply.
- Be very careful in using tools so as not to damage chrome finishes.
- While working, keep kids away from tools.
- Call a licensed plumber if unsure.
Related Posts
-
How to Fix a TV That Won’t Turn On But Has Power – 7 Easy Fixes
-
Microwave Not Heating? 5 Easy Fixes Before Calling a Technician
Most Common Questions
Q1: Why does my tap still leak even after changing the washer?
The most frequently affected area is the O-ring, valve seat, or cartridge, which need to be replaced.
Q2: Does high water pressure cause a leaking tap?
High water pressure tends to ruin washers and seals, which most of the time lead to drips.
Q3: How much water is wasted by a leaking tap daily?
A dripping tap may waste a million gallons (90 liters) of water in every day.
Q4: Can I fix a leaking tap without turning off the water?
No-you’ll flood your sink. Always shut the supply off first.
Q5: How do I know if my mixer tap needs a new cartridge?
If tightening it doesn’t stop the drip, it’s cartridge time to replace.
Conclusion
Fixing a leak from a faucet is one of the simplest and most reasonable DIY repairs. With few tools and some replacement parts, you can eliminate the drip in less than an hour. Like this, you will not only save money on your bill but also limit wastage of water and help out with the environment. And if the job is still very repetitive, don’t hesitate to call a professional plumber-it is better to solve the issue once and for all.
